Adobe InDesign: Step-by-Step Guide
Step 1: Creating a New Document
After launching your InDesign application,
- Choose File > New > Document… (See Figure 1)
Keyboard Shortcut: Ctrl+N for PC users, Cmd+N for Mac users
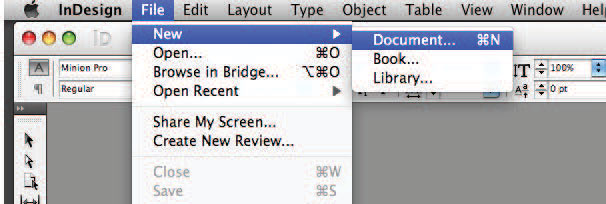
(Figure 1)
When the New Document window appears, (See Figure 2)
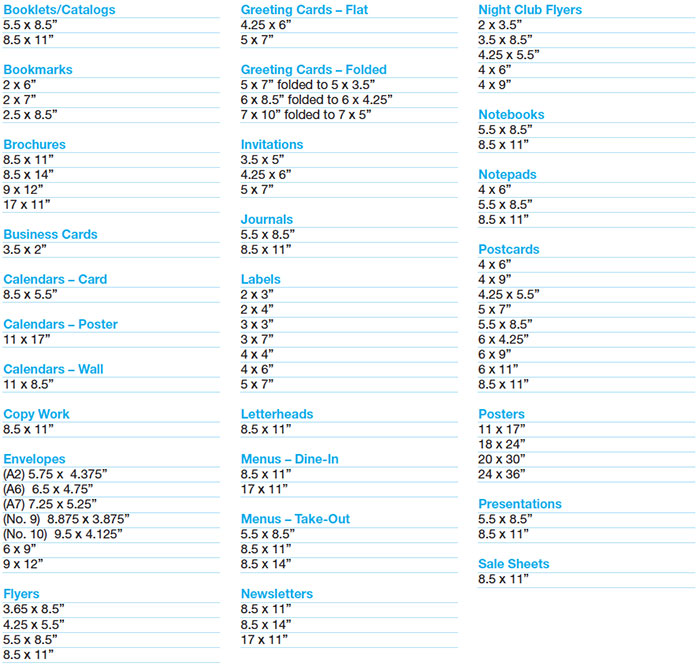
- Set the Width & Height of your artwork to the final size of the product you are creating. You can refer to this table for a quick list of product dimensions.
- Set the Bleed to 1/8" (0.125") on all four side of the artwork. This will allow an extra 1/8" (0.125") on each side of the card, which will be trimmed after the printing is complete. Please see more information about bleeds below.

(Figure 2)
Step 2: Saving Your Files
Once you have finished designing your layout, you are ready to save and submit your file to Lickity Split. Please see instructions below on how to export a PDF from Adobe InDesign. We recommend PDF format over any other, simply because it is the PREFERRED and MOST RELIABLE format of printers world-wide.
Export to PDF
The reason why we prefer PDF files is because these are the most reliable format for transporting from computer to computer, and are the preferred format among printers worldwide. If you submit perfect PDFs to Lickity Split, your order will typically move through our production process without any hang-ups. This reduces errors relating to linking of fonts and graphics, as well as often reducing the overall file size that you would upload to your printer.
- Go to the File menu and choose Adobe PDF Presets > [PDF/X-1a:2001]… (See Figure 3)
- In the Export window, give your file an appropriate name.
- Click the Save button.
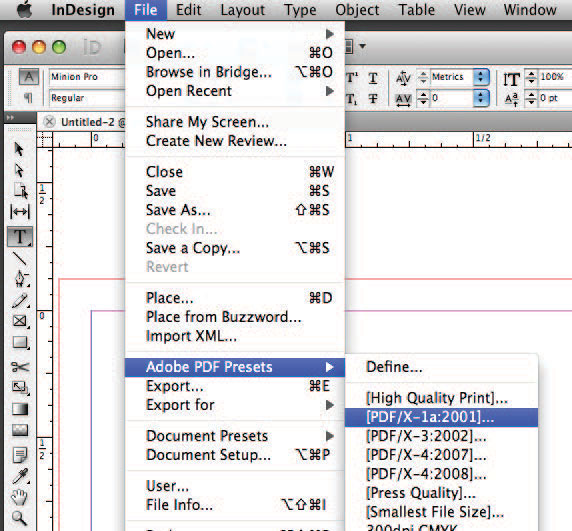
(Figure 3)
- In the Export Adobe PDF window, the Adobe PDF Preset will be set at [PDF/X-1a:2001].
- In the General setting, you’ll want to print All the pages unless you have unneeded blanks and leave Spreads unchecked.
- In the Marks and Bleeds setting, check the box for only the Crop Marks
- Set the Weight of the Marks to .25 pt and the Offset to .125"
- Under the Bleed and Slug section, set the Bleed to .125" for all four sides (See Figure 4)

(Figure 4)
- In the Output setting, choose No Conversion for the Color Conversion dropdown. (See Figure 5)
- Don’t Include Profile for the Profile Inclusion Policy.
- Click the Ink Manager button to open its window. Check the All Spots to Process box to convert any possible Spot colors used in the document to 4 color process and then click OK. Note: If you have placed a custom order using Spot colors, then you will want to leave those specified colors remaining.
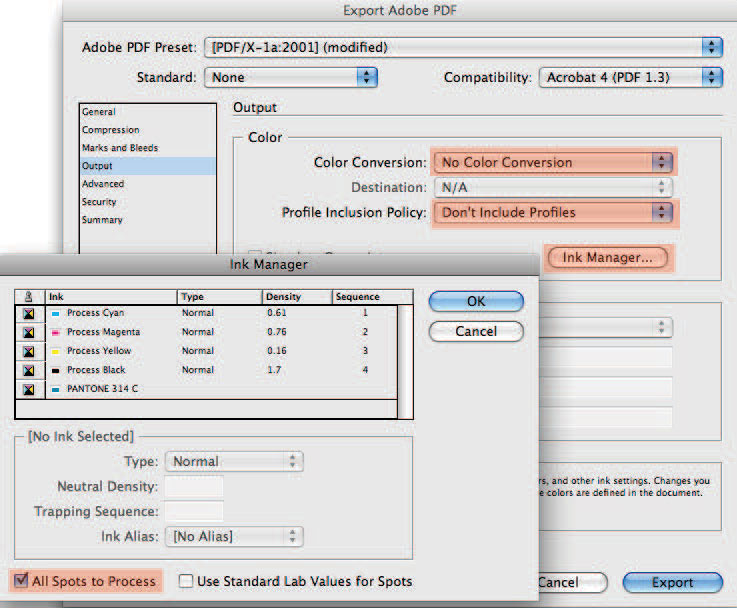
(Figure 5)
- Finally, in the Advanced setting, Subset the Fonts to 100%. (See Figure 6)
- Click on the Save Preset button at the bottom left. In the Save Preset window, give your Preset a new name such as My Print Setting or Lickity Split and click the OK button. You will now have a new preset in your available Adobe PDF Preset dropdown in InDesign.
- Click Export to save the current file as a PDF.
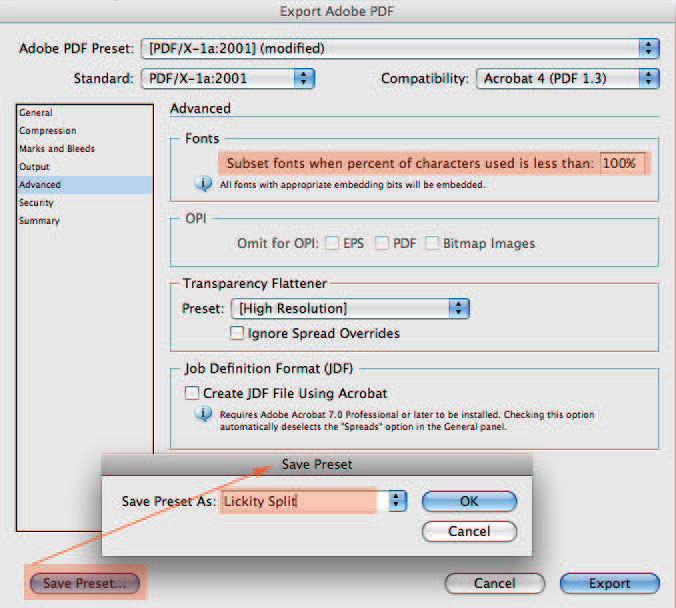
(Figure 6)