QuarkXpress: Step-by-Step Guide
Step 1: Creating a New Document
After launching your QuarkXpress application,
- Choose File > New > Project… (See Figure 1)
Keyboard Shortcut: Ctrl+N for PC users, Cmd+N for Mac users

(Figure 1)
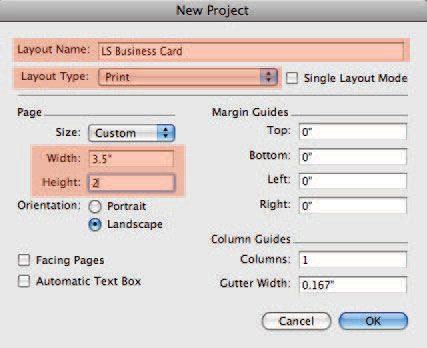
When the New Project window appears, (See Figure 2)
- Enter a name for your project.
- Set the Layout Type to Print.
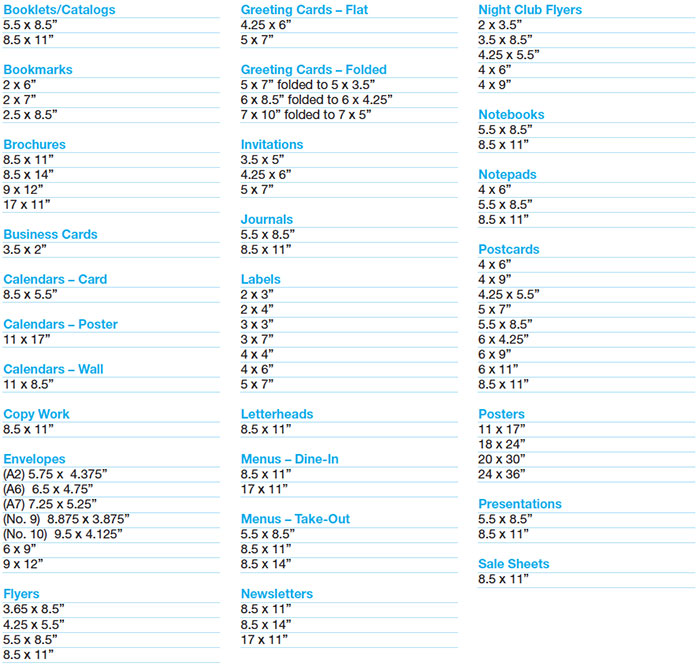
- Set the Width & Height of your artwork to the final size of the product you are creating. You can refer to this table for a quick list of product dimensions.
- Click OK to proceed.
(Figure 2)
Step 2: Exporting Your Files
When you have completed your design, and checked it against the guidelines above,
- Choose File > Export > Layout as PDF… (See Figure 3)
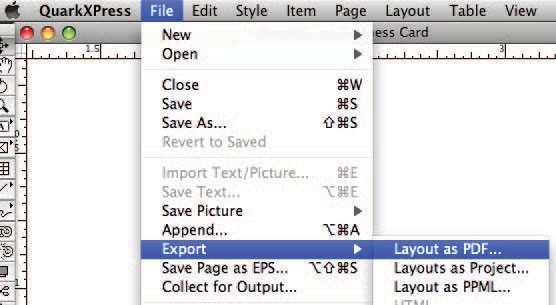
(Figure 3)
When the Export to PDF window appears, choose a name and location to save your PDF, then click the Options… button. (See Figure 4)
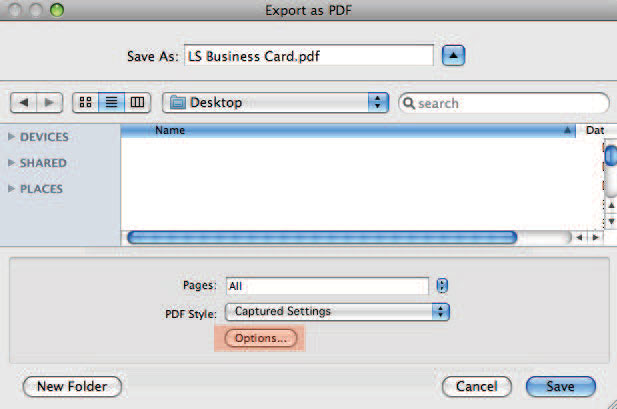
(Figure 4)
In the PDF Export Options window, select settings as follow:
- Under Compression (Figure 5), select None and Keep Resolution for all three image types.
- Check the Compress Text and Line Art and ASCII Format checkboxes.
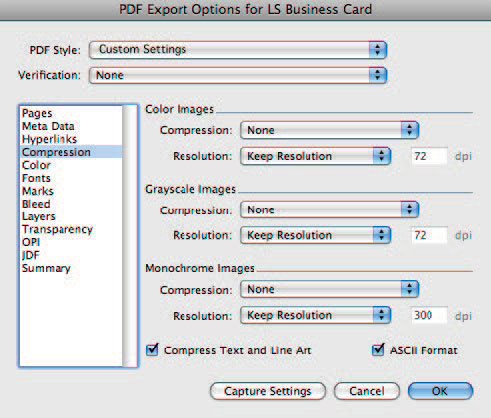
(Figure 5)
- Under Color (Figure 6), select Mode: Separations and Setup: In-RIP Separations.
- Note: If you have placed a custom order using spot colors, then you can leave those specified colors remaining. Otherwise, the only colors listed should be Cyan, Magenta, Yellow and Black. If you have not placed a custom spot color order, you will need to convert any spot colors used in the document to 4 color process before you create your PDF.
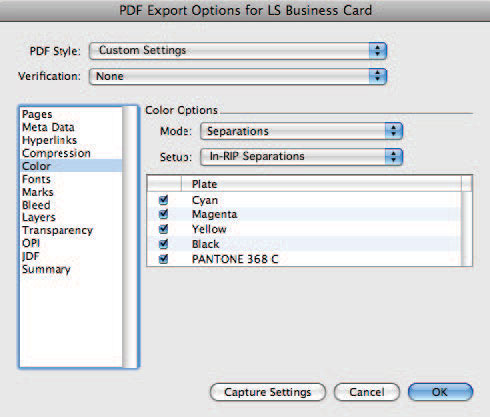
(Figure 6)
- Under Marks (Figure 7), select Mode: Centered and Offset: 6 pt.

(Figure 7)
- Under Bleed (Figure 8), set Type to Symmetric and set Amount to 0.125"
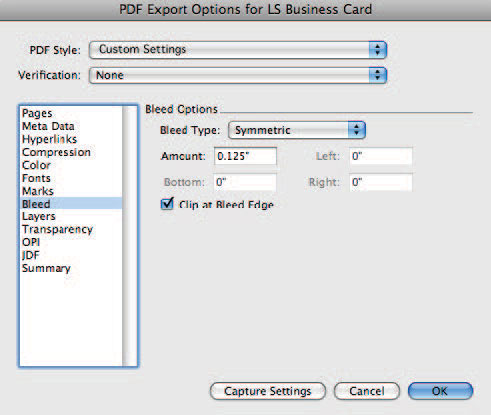
(Figure 8)
- Under OPI (Figure 9), Uncheck the OPI Active checkbox.
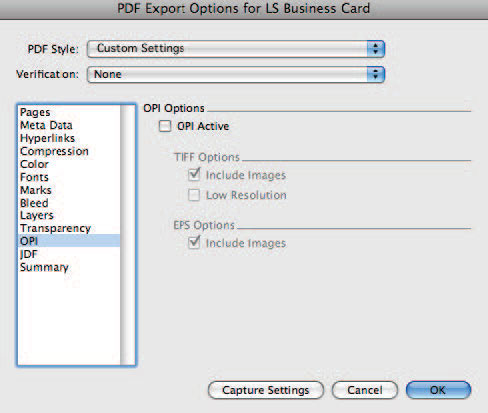
(Figure 9)
- When you’ve confirmed all the above settings, click the OK button to return to the PDF Export window.
- From the PDF export window, click the Save button and your PDF will then be saved.